
Attending several requests, we start with this article a series of works on the easy-opening covers, of the total opening type, used in preserves in a generalized manner. In this first work that kind of covers is described, as well as the materials suitable for their manufacture and the characteristics thereof are defined.
INTRODUCTION
This type of tapas has a relatively recent history, much later than the tin container, although its history goes back many years, when they started using systems that in some way favored opening. Over time there were many, among which can be listed the side opening containers by means of a tongue, the “Norway” opening caps, the “decollege” type containers, the “box bande” containers, etc.
Almost all – except for the “Box Bande” – had common points:
– Open with the help of a small key.
– Have a tongue to start opening.
– Specify a weakened area by means of incisions, for tearing.
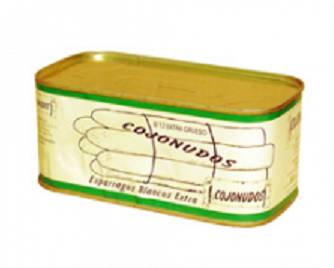
These new covers are quite different from those, since in all cases they eliminate the use of an instrument for opening. Although in some way they have much to do with the previous ones, because they are based on “a weakened area by means of incisions for tearing” the lid, which requires a ring – an old key – to start the operation. See figure nº 1.
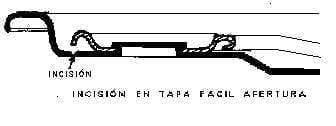
Figure nº 1
In 1959, in Dayton – North America- Ernie Fraze, a former Alcoa technician, well versed in the properties of aluminum and also an expert in die-cutting, had the first prototype of easy opening covers ready The first industrial versions are presented at the beginning of the “sixties” and they develop rapidly.
Two basic models appear, one with a partial opening in the form of a tongue – used for liquids and drinks – and another with a total opening that allows the cover to be completely removed – used for solid foods. The latter, initially had an incision in the form of triple C, and once opened had the appearance of a pig tail, receiving from there the appellative cover “pig tail”. These designs are improving over time and taking another configuration.
Several American companies offered, in a short term, tools and equipment suitable for the manufacture of easy opening covers. The tools required a very high design and precision.
The most used material in the United States was – and still is – aluminum, which is logical in a country where energy is cheap. Europe, where energy is expensive, soon changed to tin in the case of total openness. This meant a reworking of equipment and tools, quite complex. In addition, he applied this technique to non-round shaped covers (rectangular and oval) for the fish market.
The easy-open lid was gaining market safely. Today, 100% of the cans for beverages use these caps and also a very high percentage of food containers.
DESCRIPTION
Focusing already on the covers of total opening, they differ from a conventional lid in:
– An incision located in the periphery of the central panel. Parallel to the cuvette, therefore in the form of a circle in the round caps, of a depth of approximately 2/3 of the thickness of the material, and of a triangular or trapezoidal profile. Next to it, and in the central panel, a bubble is formed by drawing the metal, which serves as a rivet for fixing the ring. The shape of the panel is conditioned by these two circumstances -incision and bubble-, in a way that protects them, and at the same time fulfills the properties that a classic lid should have. See figure 2
Figure nº 2
-A ring, fixed to the lid by means of the rivet formed on the panel thereof. This ring has a pointed end – called “nose” – which is positioned exactly above a point of the incision. The ring, by means of a horseshoe-shaped cut and that surrounds the rivet, can tilt and nail its “nose” in the incision, finishing breaking the metal at this point. See figure nº 3.
Figure nº 3
– This operation is performed when the ring is approximately inclined 45º. When it reaches the vertical position – at 90º in relation to the lid panel – the ring is pulled – for this they have a hole that allows to pass the finger of the hand – and the total tear of the panel is produced, separating it from the lid and thus cause the container to open.
As for the other elements that form the lid: wing, curl, compound, etc. they correspond to the same elements of a classic lid of identical size and use.
CRITERIA
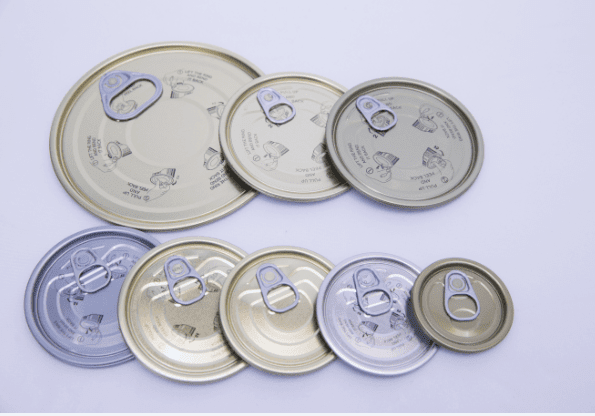
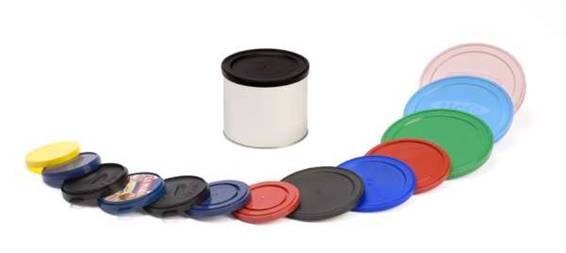
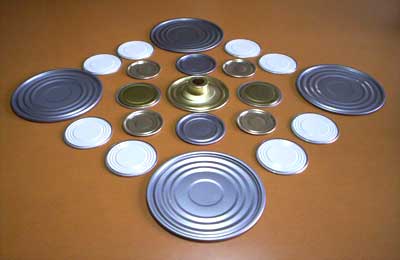
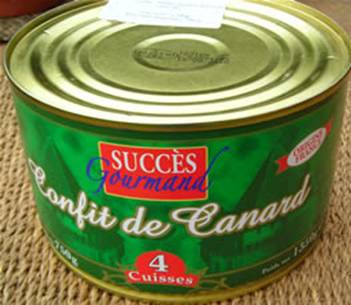
This type of tapas can be used for all processed or non-processed foods, in 2 and 3-piece packages. They have excellent application in products such as milk, fish, meat, prepared foods, legumes, fruits and vegetables, animal feed …
The easy opening covers are made of metal (tinplate, TFS or aluminum) and, due to their shape, they can be round, rectangular or oval. Both the panel and the ring are protected internally and externally by varnishes. Those used externally may be colorless or gold.
A good easy opening lid, must fully meet the needs of packaging companies and distributors and retailers in terms of:
– Excellent opening, with reasonable effort.
– High burst pressure value.
– High level of protection against corrosion.
– High level of behavior against abuse and management.
It is statistically proven by means of surveys in different countries, that the consumer prefers tapas with opening per ring, since they provide a series of advantages such as:
– More comfortable to use than a normal can, because they do not require any useful opening.
– Easy and quick to open.
– Ergonomically comfortable.
– Safe to open and use
– Good protection against implosions / explosions
– Attractive design
– A more hygienic container, because you do not have to introduce any tool into the can, that is, a can opener.
– Strong packaging with great resistance to abuse.
A good cover for easy opening, can contribute to promote the knowledge of a brand, and the preference and loyalty towards it.
PROTECTION
These covers require good quality varnish systems, both inside and outside.
Inside, it is necessary to apply a sufficiently safe varnish system, to guarantee that once the lid is finished, it does not have porosity located under the rivet, nor below the incision area. The area of the rivet is subjected to a strong stretch, necessary to generate sufficient material for the formation of the same, and subsequently to a forceful impact for the fixation of the ring. The area of the incision suffers the blow of the incision punch against the anvil. Both operations subject the interior varnish to harsh conditions.
The interior system can be golden or white. It is always formed by at least the application of two different varnishes and complementary to each other. Appropriate systems can be:
– Interior golden tone:
– Option a): Triple pass polyester varnish, the first two passes in golden version and the last colorless, with a total load of the order of 22 grs / m2.
– Option b): A first pass of golden epoxy-phenolic varnish with low load and a second pass of golden organosol, with a total load of about 25 g / m2.
– White interior color
– Option a) Triple layer of polyester varnish, the first two in white and the third in colorless, with a total load of about 24 g / m2.
– Option b) Double layer of pigmented organosol with a total load of 30 grs / m2
It is advisable to check the internal porosity with the cadmium test.
Externally, the situation is even harder, since an effective break of the varnish system occurs when the incision is made on the external side. Although in this case later, at least the most affected areas will be “repaired” by means of a rebarnizado.
The external system of varnishes can present more variety of possibilities, since the externally lid can go only varnished (colorless or gilded) or lithographed on metal or on a white enamel
Some reference systems can be:
-Outer gold cover: An epoxy-urea low-tack coating varnish, followed by a golden phenolic epoxy, with a total load of about 8 g / m2
-Outer colorless layer: An epoxy-urea low-tack coating, followed by a colorless modified epoxy, with a total load of about 8 g / m2.
– Cover with printing on metal: A varnish of hooking equal to the previous cases and a final varnish of finish (on lithography) acrylic.
– Cover with white enamel printing: A hooking varnish similar to the previous cases, followed by a white acrylic enamel, and after printing one also acrylic finish.
Packages of material that have already been varnished and that are waiting to enter the manufacturing phase of the caps, should be protected from dust, since the delicacy of the manufacturing tools of these caps, require a high degree of cleaning.
PANEL DESIGN
The design of the panel has evolved from a series of technical developments aimed at achieving an adequate behavior cover. A well designed panel:
-permits a good formation of the rivet fixing the ring.
-It suppresses the folds and favors the softness of breakage of the panel.
-reduces the presence of incipient “peaks”.
-limits the “spongy” effect around the rivet and improves the overall appearance of the component.
A panel with soft gradients in the form of “C” is the one that has given satisfaction in all the aspects previously enumerated. See figure no. 4. In the first use times of the easy opening lid, it was common to print on the panel the opening instructions, with illustrative drawings of the different phases. Although this practice is still advisable, today with the widespread use of this type of caps it is not necessary to follow this criterion, since the average consumer has learned to use them correctly.
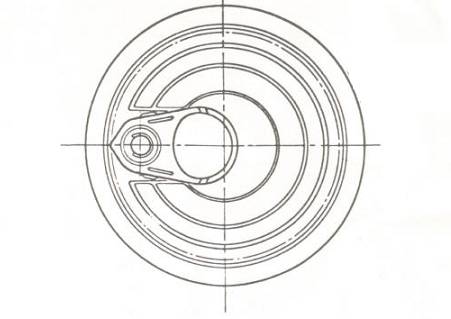
Figure nº 4
The most critical part of an easy opening lid is the incision, through which the central panel tear occurs. A good design of the same will facilitate the effort to make to detach this panel. The protection or “repair” applied to prevent corrosion of the incision is also very important. Hence, these two factors, a) execution of the incision and b) protection of it, are those that add more value, and are therefore the best kept secrets by manufacturers
A well-designed and controlled incision should allow the lid to open. with the help of the ring, exerting moderate efforts. As a reference we can indicate the following values:
– PERFORATION EFFORT: It is the effort necessary to nail the nose of the ring in the incision, and pierce the lid at that point. Its value must be 3 daN (deca Newton) maximum, measure taken at 45º of tilt of the ring.
– TEARING EFFORT. Force necessary to detach the panel. Measure with the 90º ring:
- Tapas diameter 65 – 73 4 .5 daN +/- 1.5 daN
- Lids diameter 83 – 99 5 daN +/- 1.5 daN
- Rectangular 5.5 daN +/- 1.5 daN
- Oval 5.5 daN +/- 1.5 daN
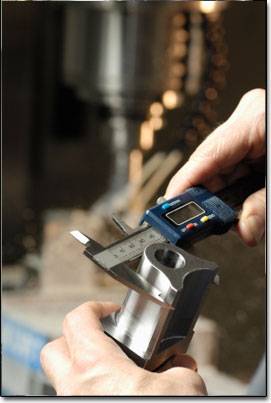
– RESIDUAL THICKNESS. Thickness of metal remaining under the incision: 75 microns (thousandths of a millimeter) at its lower limit. Value taken with “Federal” gauge, with internal varnish type organosol applied and without repair varnish. The maximum variation of residual thickness along the incision should not exceed 15 microns, that is, not exceed 90 microns at any point.
There are different types of incision, the most common are those that use a profile incision punch:
– trapezoidal
– in a V shape, in a 70º symmetrical angle
These second ones give better results.
The anvil, on which the incision punch hits, has a toroidal shape of 0.5 mm radius in the case of round caps, see figure 5, and bevelled in non-round caps, since the toroidal shape is complex to perform in non-round contours. See figure # 6.

Figure nº 5
Figure nº 6
To protect the incision against abuse, the panel should be provided with an inverted protective peripheral cord, located between the incision and the wall of the tray. See figure No. 2 above.
The recommended sequence of manufacture in the different seasons of the production press of the cover is:
Round covers: 1st Panel.- 2nd Incision
Non-round lids: 1st Prepanel.- 2nd Incision.- 3rd Panel
If the cover is manufactured in tinplate, a reference specification of the material is as follows:
– Base steel: No inclusions
– Continuous casting
– Calmed to aluminum
– Continuous Annealing (CA)
– Temple: T67
– Thickness: 0.21 or higher, depending on the diameter to be manufactured.
– Surface finish: Stone
– Passivation: 311
– Tinned: Differential 5.6 / 2.8
– Elastic limit: 420 – 480 MPa (mega pascals) (longitudinally)
– Minimum residual elongation: 15%
If the lid is made in TFS, the steel base can be the same.
RING
A good ring should gather a series of properties such as:
– Large hole to allow the passage of the finger.
– Robustness to withstand the tear effort without deforming sensibly.
– Do not have sharp edges.
– Clean appearance
– Well “repaired” to avoid oxidations.
The ring must be firmly fixed, so that it does not rotate in the rivet. It must withstand at least an effort of 12 daN without detaching from the rivet.
The specifications of the material suitable for the case of tinplate would be:
Base steel:
– Type: Colada continues
– Temple: T65
– Continuous Annealing (CA)
– Thickness: 0.36 mm
Covering:
Tin
– Passivation: 311
– Tinned: 2.8 / 2.8
– Finish: Stone
– Appearance: Brilliant
The ring can also be made in zinc plated material or in TFS with the same characteristics of the steel base.
PROTECTION AGAINST CORROSION
As we have already pointed out, the protection or “repair” of the lid is fundamental, since when the initial outline or shell is transformed, converting it into the lid itself, adding the opening incision and the rivet fixing the ring, they are produced a series of damages in the varnishes previously applied in plane.
Externally you have to “repair”, applying a new varnish once the finished cover. There are several procedures to perform this operation, such as:
– Injection of varnish sprayed by nozzle, on the entire outer surface of the lid. See figure # 7
Figure nº 7
– Injection of sprayed varnish only in the area of the incision and rivet by means of nozzle mounted on a rotating head.

– Application of varnish by electrophoresis.
In all cases, a subsequent baking of the lid is required for the adequate polymerization of the varnish. A verification of the repair is required by means of the copper sulfate test (CuSO4).
In the case of “repair” by spraying, two-component, colorless varnishes are used, which are mixed just before being used. The proportion of each component varies depending on the manufacturer of the same. The temperature of baking and the time of passage through the oven also depend on the type of varnish used, but it is at least 120 ° C and several minutes.
There are some applications of easy-open covers, such as those used for products that do not carry process – nuts, cookies, … – or very little aggressive, which can be dispensed with the “repair” of the lid, to make the product cheaper. In this case it is necessary to lightly lubricate the area of the rivet and the incision, with a sanitary oil. This lubrication is carried out by means of an atomization thereof by nozzle. This prevents an environmental attack that could cause oxidation at points where steel is exposed.
On the contrary, some manufacturers, to better guarantee the protection of the lid, “repair” both the exterior and the interior of it.
DETAILS TO IMPROVE THE OPENING
We describe some details that can incorporate the covers to facilitate their use.
- A) Protuberances for finger passage assistance
They are two raised areas in the form of a protuberance placed on the panel of the lid, just below the end of the ring, of an approximate height of 0.7 mm. They allow to raise slightly this one and, consequently leave a small space between the ring and the panel. This facilitates the passage of the nail and the tip of the finger to initiate the opening. See figure nº 8
Figure nº 8
- B) Rebate for the passage of the finger
It consists of making a step-shaped recess in the central part of the panel that coincides below the end of the ring. It allows to leave space between this and the panel, facilitating the passage of the tip of the finger under the ring. See figure nº 8
A and B are two solutions that both seek the same effect, you can choose one of them or both together.
- C) Bending of the end of the ring
It involves raising the end of the ring up, curving it slightly. This way you get more space between it and the central panel. This also results in facilitating the passage of the finger under the ring. See figure nº 9
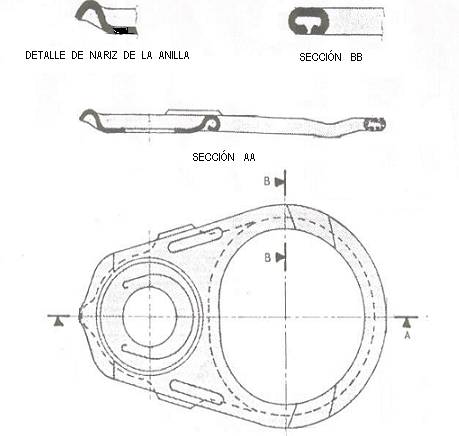
Figure 9
This solution is the most efficient of the three listed, but it is the least used because it has the serious drawback of being able to cause hooks of rings in the process of sterilization in the canneries. Especially in the filling of semi-solid products, which have a somewhat coefficient of expansion, such as animal or meat foods. In these cases the lid bulges, and the ring with its raised end emerges above the level of the closure, producing hooks and openings of lids.
It is common to use rings with the end inclined downwards – towards the surface of the central panel – precisely to eliminate this risk of hooking of rings. See figure nº 8.
SECURITY DETAILS
Trapezoidal incision sections in the “V” incisions
Area along the incision, of a length and in a defined position, as it is on the nose side of the ring (point 1) – see figure No. 10- or / and on the opposite side (point 2), in which leaves a greater residual thickness in the incision, ie the incision is a little less deep. Therefore this specific zone is less prone to tearing. This is achieved, in the case of a punch in “V”, killing slightly – about 0.05 mm – the sharp edge in the areas to act, thus presenting the incision a trapezoidal section in these sections.
With this a double objective is achieved: Avoid implosions / explosions in the opening.
In the case of point 1: Allow the balance of the internal and external pressure at the point of drilling, which can lead to explosion / implosion of the lid, when the difference is lifted. It is carried out by means of two separate points about 15 mm. and of a length of 1.5 mm each.
In the case of point 2: Hold the lid in case it jumps, due to intense internal pressure (burst). In this case the reduction of the incision will be made in a section of about 15 mm.
Of these two options, the second is more used, although the two can be used together or indistinctly.
 Recommendations for the use of easy-opening ends
 CHROME PLATE IN VEGETABLE PRESERVES
 MANUFACTURING PROCESS OF AN EASY-OPEN LID
 THE CURL ON THE TAPAS
 PERFORATIONS FOR GOLLETES / PLUGS
 OVERHEADS AND PRESSURE PLUGS FOR METAL CONTAINERS
 CALCULATION OF STANDARD COST FROM A COVER
 PRODUCT TECHNICAL DATA SHEET: ENDS
 DETERMINATION OF THE COURT FROM A ENDS
 PROFILES OF CAPS / ENDS FOR ROUND CANS


0 Comments