The manufacturing process of an aluminum beverage can body involves several steps, which are typically carried out on an integrated high-speed production line. Here is a summary of the process:
- Aluminum coil preparation: The process starts with large aluminum coils, which are uncoiled and fed into the can making machinery. These coils are usually about 0.30 mm thick.
- Lubrication: The aluminum strip is lubricated to facilitate subsequent forming operations.
- Die-cutting: The lubricated strip is cut into round pieces called “dies”, which will form the base and sides of the can.
- Stretching and re-stretching: The dies are stretched into a cup shape through a process called “stretching”. The cups are then re-stretched to achieve the desired diameter and depth.
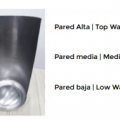
- Wall ironing: Stretched cups go through a process called “wall ironing”, which thins the walls of the cup to the desired thickness. The base of the can retains the original thickness for greater strength, while the walls are ironed to approximately 0.110 mm. The top of the can wall is not ironed as much and ends up with a thickness of about 0.16 mm to facilitate the following steps.
- Trimming: Excess material from the top of the can is trimmed to create a uniform edge.
- Washing, decorating and varnishing: After ironing, the can bodies are washed and then decorated with the required design. A protective varnish is also applied.
- Neck: The can body goes through a process called “necking,” where the diameter of the can opening is reduced to accommodate the can end (lid).
- Grooving: Finally, a groove is created at the open end of the can to allow the end of the can to be sealed securely.
This process results in a lightweight, strong, stackable aluminum can body ready to be filled with a beverage and sealed with a can end.
 What are the main parts of 2pc can making equipment?
 How to reduce can topwall variations
 How a necker station works
 What is the purpose of the separator ring and pilot ring on the bodymaker machine?
 Uneven wall thickness in aluminum cans
Understanding and Addressing the Short Trim Defect in the Bodymaker Process
Uneven wall thickness in aluminum cans
Understanding and Addressing the Short Trim Defect in the Bodymaker Process
 what is the defect in aluminum can called short can?
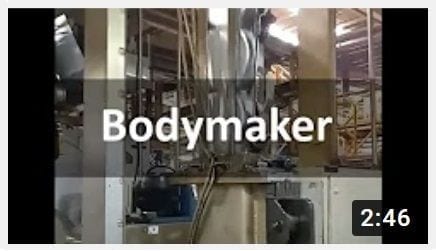
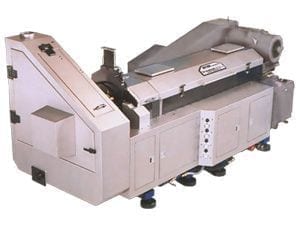 The Bodymaker: A Key Component in Aluminum Can Production
 Bodyformer Tool Pack Configurations
 FORMING PROCESSES IN AN ALUMINIUM BEVERAGE CAN PRODUCTION LINE