
Every year nearly a half trillion units of beverage can are manufactured— that’s about 15,000 per second — so many that we overlook the can’s superb engineering. Let’s start with why the can is shaped like it is. Why a cylinder?
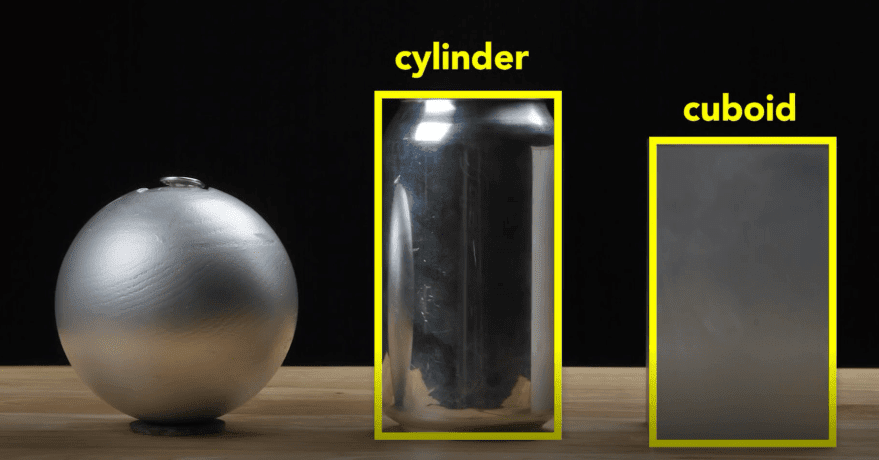
An engineer might like to make a spherical can: it has the smallest surface area for a given volume and so it uses the least amount of material and it also has no corners and so no weak points because the pressure in the can uniformly stresses the walls but a sphere is not practical to manufacture and, of course, it’ll roll off the table. Also, when packed as closely as possible only 74% of the total volume is taken up by the product the other 26% is void space, which goes unused when transporting the cans or in a store display.
An engineer could solve this problem by making a cuboid-shaped can It sits on a table, but it’s uncomfortable to hold and awkward to drink from and while easier to manufacture than a sphere, these edges are weak points and require very thick walls but the cuboid surpasses the sphere in packing efficiently, it has almost no wasted space, although at the sacrifice of using more surface area to contain the same volume as the sphere, So to create a can engineers use a cylinder, which has elements of both shapes from the top, it’s like a sphere, and from the side, it’s like a cuboid.
A cylinder has a maximum packing factor of about 91% not as good as the cuboid, but better than the sphere.


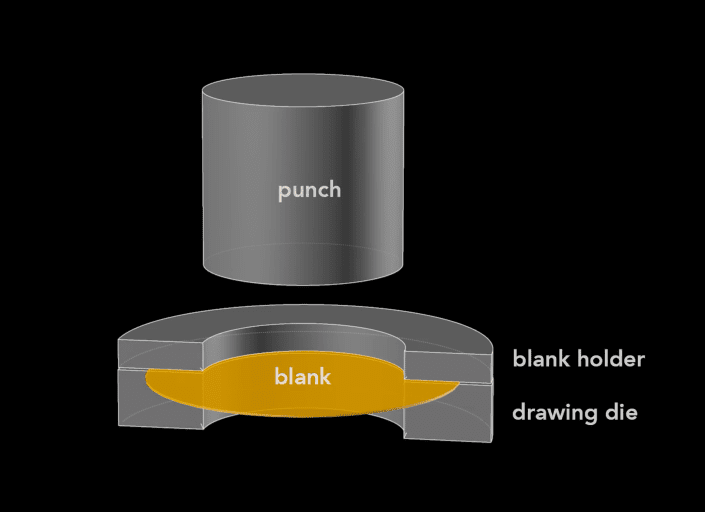
The can begins as this disk —called a “blank”—punched from an aluminum sheet about three-tenths of a mm thick.
The first step starts with a “drawing die,” on which sits the blank and then a “blank holder” that rests on top.
We’ll look at a slice of the die so we can see what’s happening.
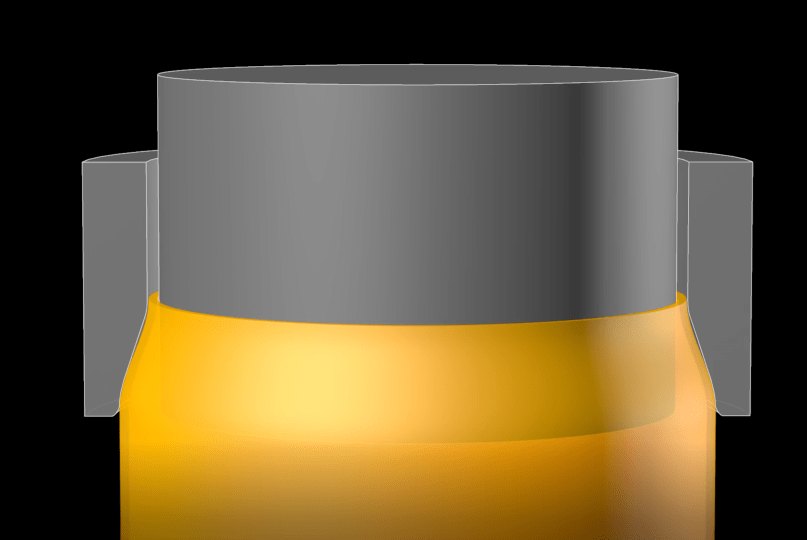
A cylindrical punch presses down on the die, forming the blank into a cup this process is called “drawing.” This cup is about 88 mm in diameter—larger than the final can — so it’s re-drawn.
That process starts with this wide cup, and uses another cylindrical punch, and a “redrawingdie.”
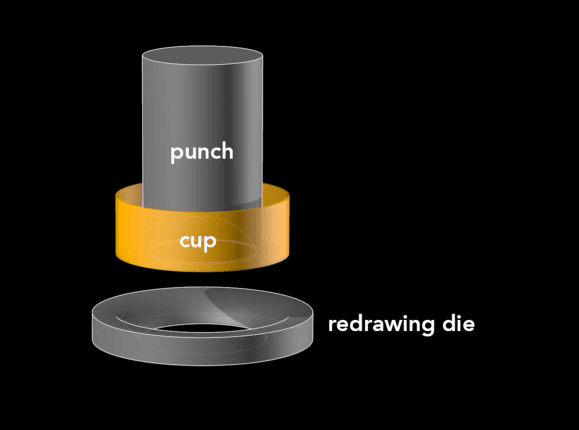
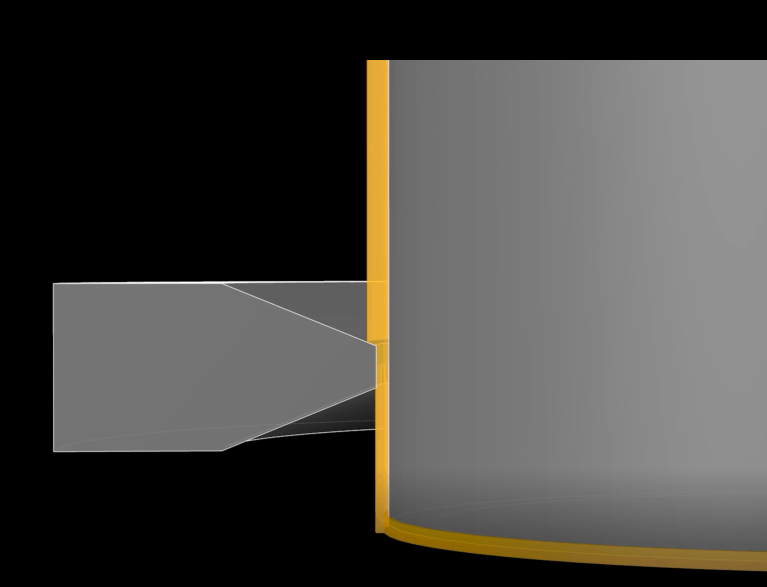
The punch presses the cup through the redrawing die and transforms it into a cup with a narrower diameter, which is a bit taller this redrawn cup is now the final diameter of the can—65 mm—but it’s not yet tall enough, A punch pushes this redrawn cup through an ironing ring the cup stays the same diameter, as it becomes taller and the walls thinner.
If we watch this process again up close, you see the initial thick wall, and then the thinner wall after it’s ironed, Ironing occurs in three stages, each progressively making the walls thinner and the can taller.
After the cup is ironed, the dome on the bottom is formed, this requires a convex doming tool and a punch with a matching concave indentation as the punch presses the cup downward onto the doming tool: the cup bottom then deforms into a dome that dome reduces the amount of metal needed to manufacture the beverage can, The dome bottom uses less material than if the bottom were flat.
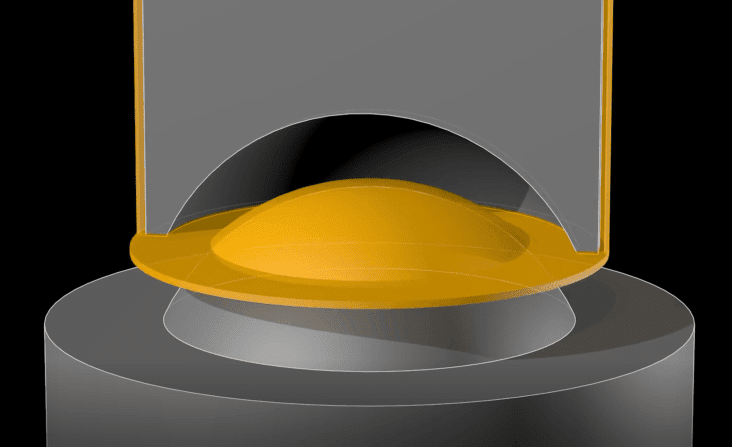
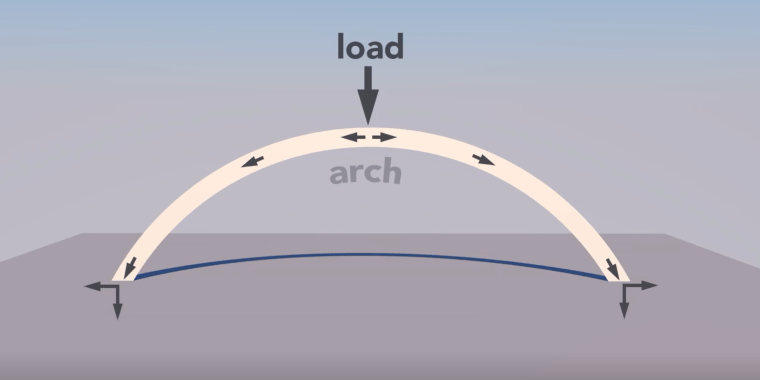
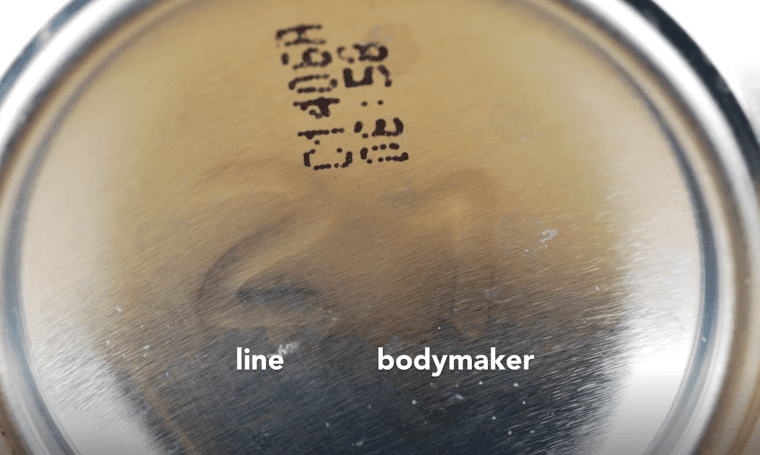
A dome is an arch, revolved around its center, the curvature of the arch distributes some of the vertical load into horizontal forces, allowing a dome to withstand greater pressure than a flat beam On the dome you might notice two large numbers, These debossed numbers are engraved on the doming tool: the first number signifies the production line in the factory, and the second number signifies the bodymaker number — the bodymaker is the machine that performs the redrawing, ironing and doming processes.
These numbers help troubleshoot production problems in the factory.
In that factory the manufacturing of a can takes place at a tremendous rate: these last three steps— re-drawing, ironing and doming—all happen in one continuous stroke and in only a seventh of a second, The punch moves at a maximum velocity of 11 meters per second and experiences a maximum acceleration of 45 Gs, This process runs continuously for 6 months or around 100 million cycles before the machine needs servicing.
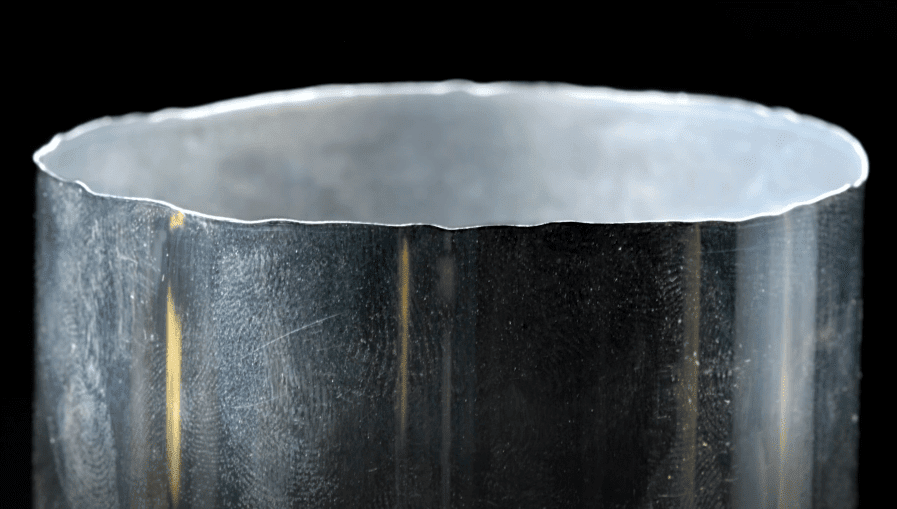
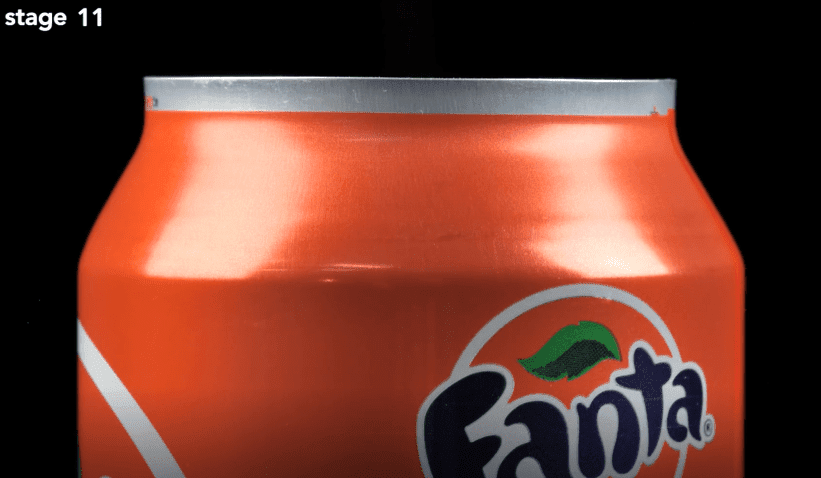
Now, if you look closely at the top of the beverage can body, you see that the edges are wavy and uneven These irregularities occur during the forming, To get a nice even edge, about 6 mm is trimmed off of the top With an even top the can, can now be sealed.
But before that sealing occurs a colorful design is printed on the outside—the term of art in the industry is “decoration.” The inside also gets a treatment: a spray-coated epoxy lacquer separates the can’s contents from its aluminum walls, this prevents the drink from acquiring a metallic taste, and also keeps acids in the beverage from dissolving the aluminium.
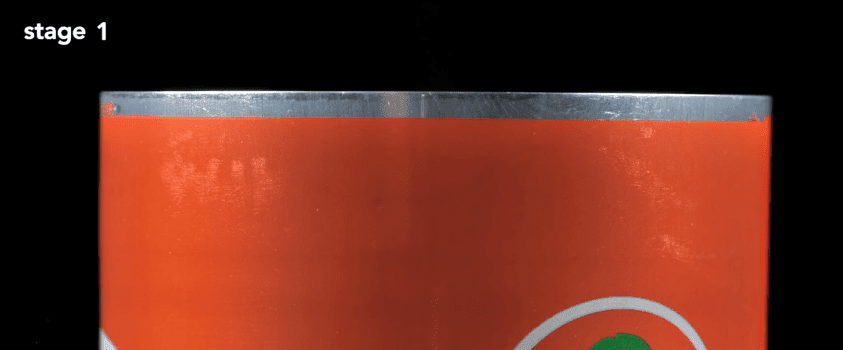
The next step forms the can’s neck — the part of the can body that tapers inward, This
“necking” requires eleven-stages.
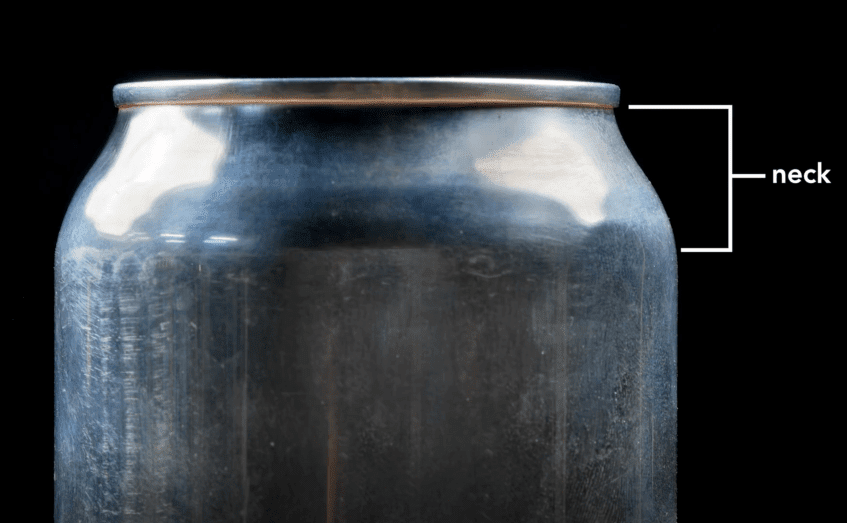
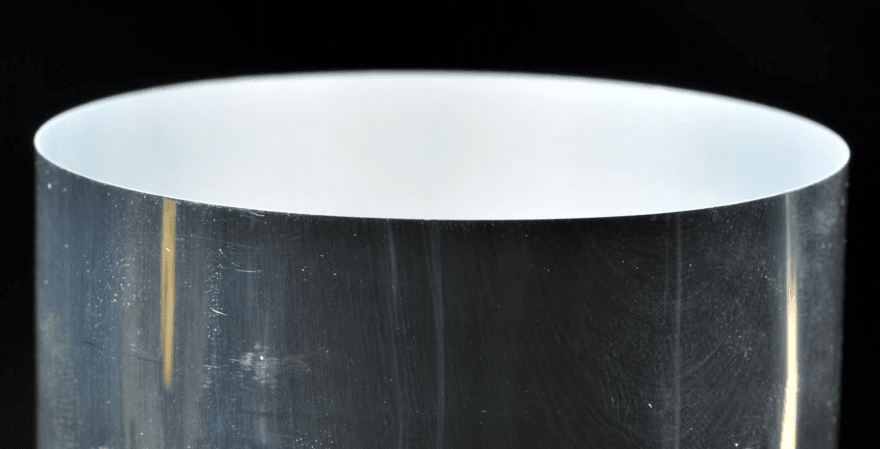
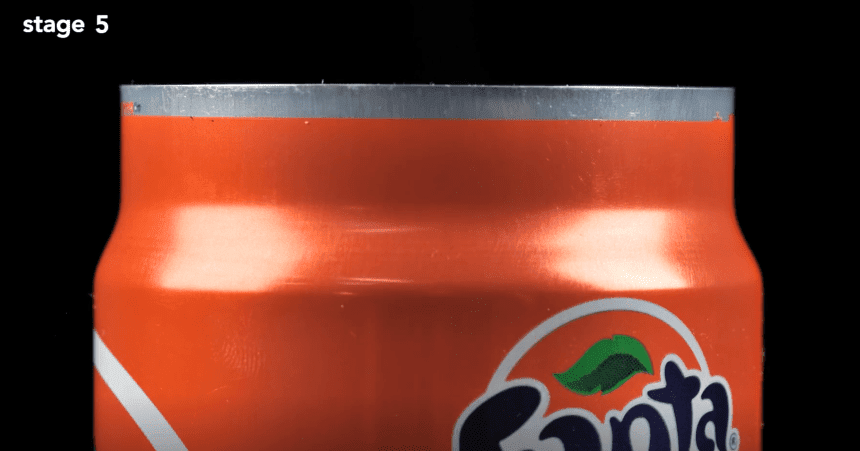
The forming starts with a straight-walled can, The top is brought slightly inward And then this is repeated further up the beverage can wall until the final diameter is reached. The change in neck size at each stage is so subtle that you can barely tell a difference between one stage and the next. Each one of these stages works by inserting an inner die into the can body, then pushing an outer die—called the necking sleeve—around the outside, The necking sleeve retracts, the inner die retracts, and the can moves to the next stage. The necking is drawn out over many different stages to prevent wrinkling, or pleating, of the thin aluminum.
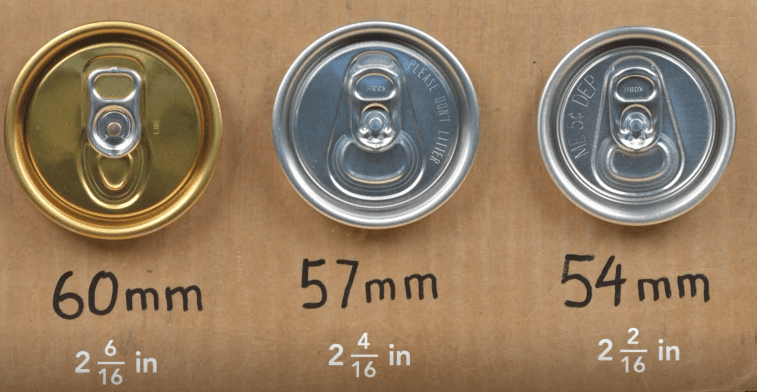
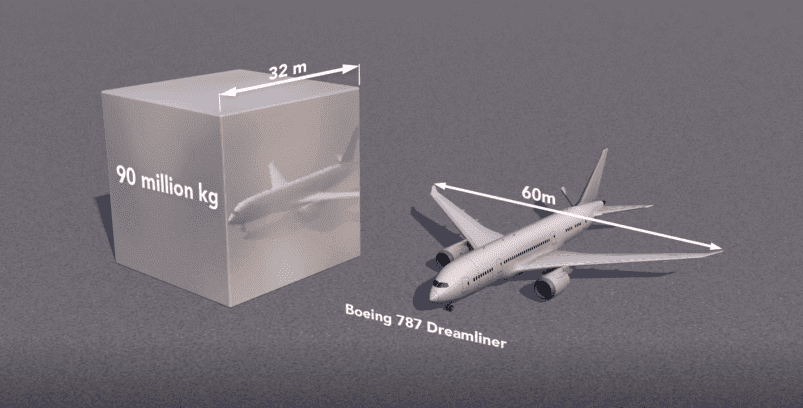
Since the 1960’s, the diameter of the beverage can end has become smaller by 6 mm — from 60 mm to 54 mm today. This seems a tiny amount, but the aluminum can industry produces over 100 billion cans a year, so that 6 mm reduction saves at least 90 million kilograms of aluminum annually, That amount would form a solid cube of aluminum 32 meters on a side—compare that to a 787 dreamliner with a 60 meter wingspan.
Now, after the neck has been formed the top is flanged,
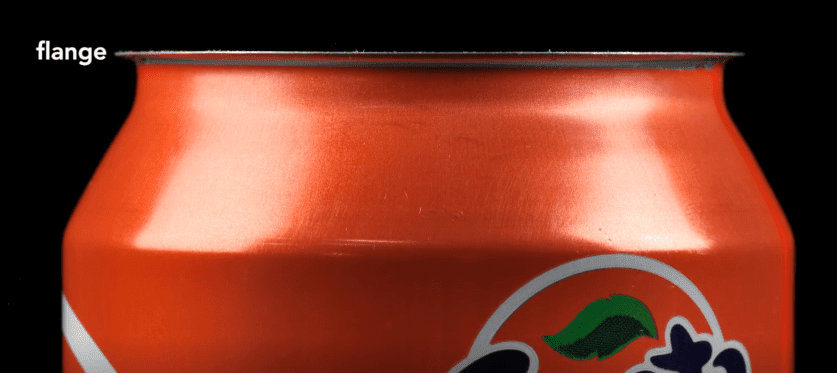
that is, it flares out slightly and allows the end to be secured to the body, which brings us to the next brilliant design feature: the double seam.
On older steel cans manufactures welded or soldered on the ends this often contaminated the can’s contents, In contrast, today’s beverage can use a hygienic “double seam” which can also be made faster.
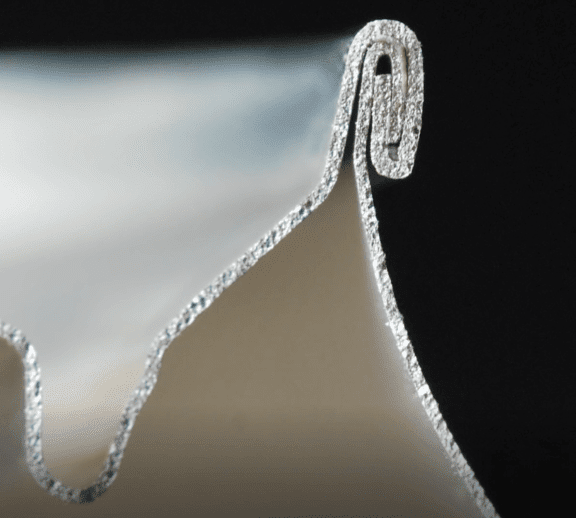
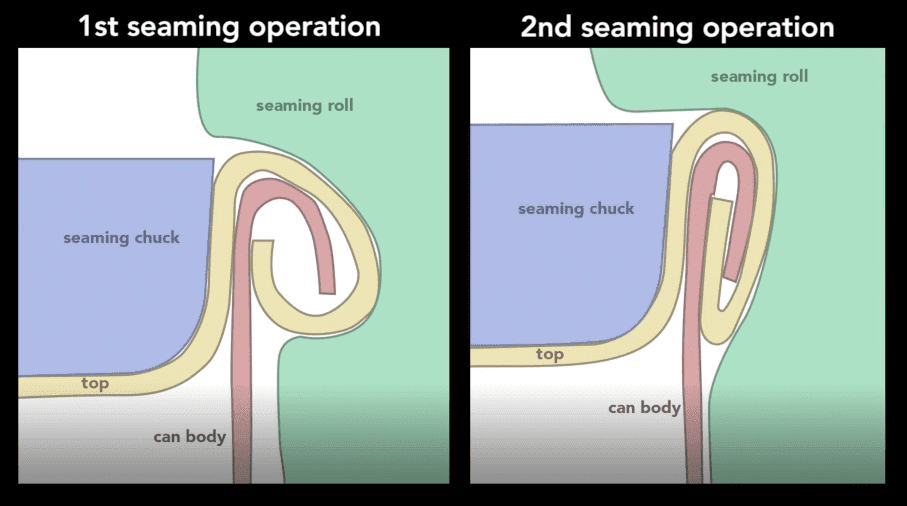
This beverage can is cut in half so you can see the cross-section of the double seam. To create this seam, a machine uses two basic operations. The first curls the end of the can cover around the flange of the can body. The second operation presses the folds of metal together to form an air-tight seal.
While the operations themselves are simple, they require high precision parts misaligned by a small fraction of a millimeter cause the seam to fail, In addition to the clamping of the end and can body, a sealing compound ensures that no gas escapes through the double seam The compound is applied as a liquid, then hardens to a form a gasket The end, attached immediately after the cans is filled, traps gases inside the can to create pressures of about 30 psi or 2 times atmospheric pressure. In soda, carbon dioxide produces the pressure; in non carbonated drinks, like juices, nitrogen is added.
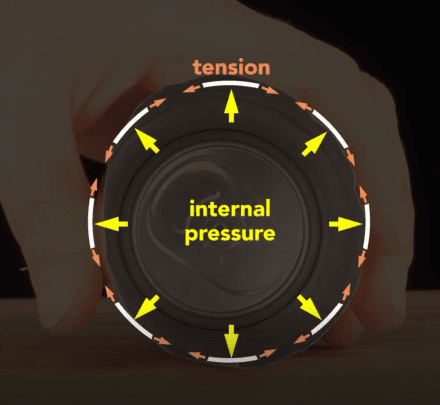
So why is a beverage can pressurized?
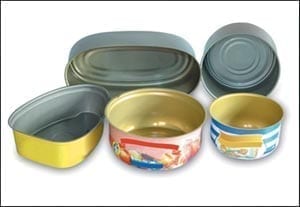
Because the internal pressure creates a strong can despite its thin walls, Squeeze a closed, pressurized can—it barely gives. Then squeeze an empty can—it flexes easily, The cans walls are thin—only 75 microns thick—and they are flimsy, but the internal pressure of a sealed can pushes outwards equally, and so keeps the wall in tension, This tension is key: the thin wall acts like a chain — in compression it has no strength, but in tension it’s very strong, The internal pressure strengthens the cans so that they can be safely stacked —a pressurized can easily supports the weight of an average human adult, It also adds enough strength so that the can doesn’t need the corrugations like in this unpressurized steel food can While initially pressurized to about 2 atmospheres, a can may experience up to 4 atmospheres of internal pressure in its lifetime due to elevated temperatures; and so the can is designed to withstand up to 6 atmospheres or 90 psi before the dome or the end will buckle.
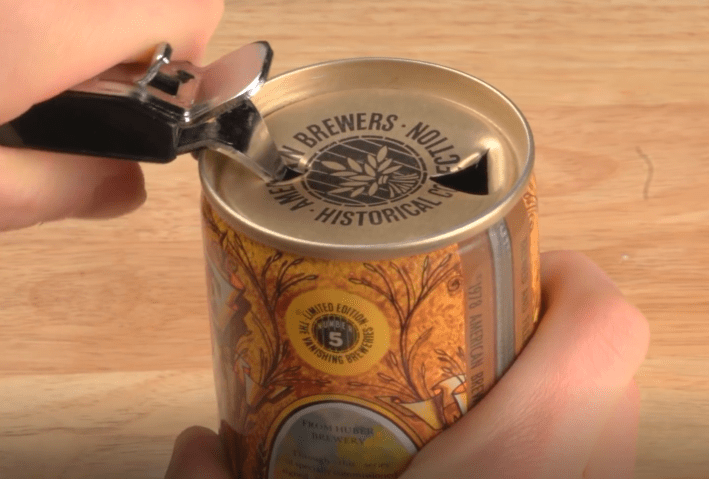
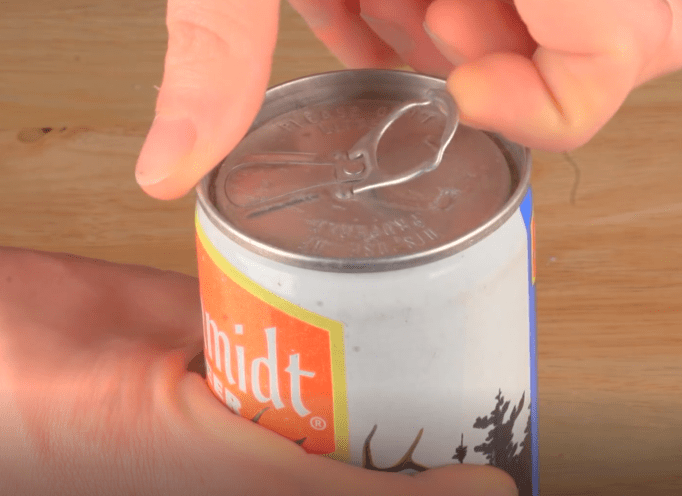
Why is there a tab on the end of the can? It seems a silly question—how else would you open it? But originally cans didn’t have tabs, Very early steel cans were called flat tops, for pretty obvious reasons, You use a special opener to puncture a hole to drink from, and a hole to vent. In the 1960’s, the pull-tab was invented so that no opener was needed, The tab worked like this: you lift up this ring to vent the can, and pull the tab to create the opening, Easy enough, but now you’ve got this loose tab, The cans ask you to “Please don’t litter” but sadly, these pull tabs got tossed on the ground, where the sharp edges of the tabs cut the barefeet of beachgoers—or they harmed wildlife. So, the beverage can industry responded by inventing the modern stay-on tab, This little tab involved clever engineering.
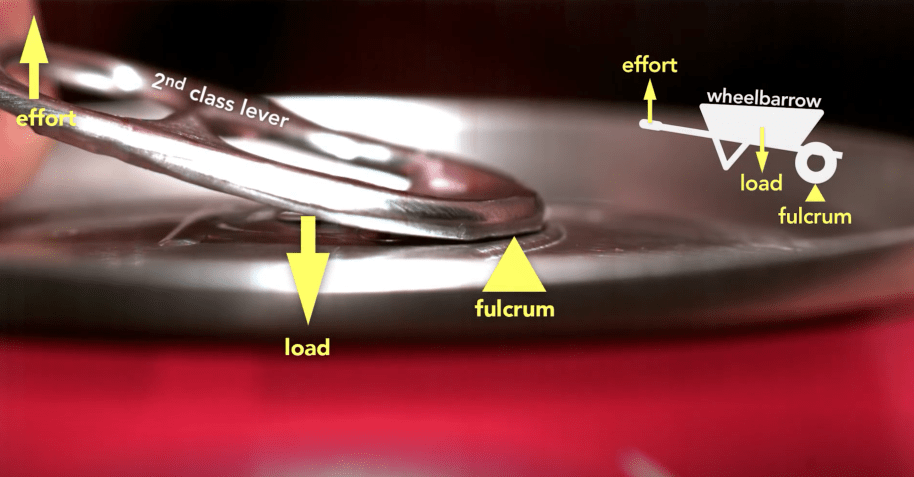
The tab starts as a second-class lever; this is like a wheelbarrow because tip of the tap is the fulcrum and the rivet the load — the effort is being applied on the end, But here’s the genius part: the moment the can vents the tab switches to a first class lever which is like a seesaw: where the load is now at the tip and the fulcrum is the rivet, You can see clearly how the tab, when working as a wheelbarrow, lifts the rivet. In fact, part of the reason this clever design works is because the pressure inside the can helps to force the rivet up, which in turn depresses the outer edge of the top until it vents the can and then the tab changes to a seesaw lever.
Looking from the inside of the can, you can see how the tab first opens near the rivet, If you tried to simply force the scored metal section into the can using the tab as a first class lever with the rivet as the fulcrum throughout you’d be fighting the pressure inside the can: the tab would be enormous, and expensive.
Thanks to Rexam for providing us with aluminum cans in various stages of production.
Thanks to Bill Hamman of www.engineerguy.com
 Troubleshooting strategy for an aluminum beverage can production line
 FORMING PROCESSES IN AN ALUMINIUM BEVERAGE CAN PRODUCTION LINE
 Aluminum specifications for beverage cans and lids
 Making a can from recycled aluminum saves more than 90% of the energy needed to make a new can.
 Food and Beverage Metal Cans Market by Internal Pressure Grade
 Importance of aluminium material in the manufacture of beverage cans
Aluminum beverage cans
aluminum cans
Importance of aluminium material in the manufacture of beverage cans
Aluminum beverage cans
aluminum cans
 DIMENSIONS FOR CUPPAGES OF ENERALED AEROSOLS
 DESIGN AND DIMENSIONED OF LITHOGRAPHY AND VARNISHES


0 Comments