We will study in this work the defects that can be presented more frequently in the realization of a lithography, its classification and its control.
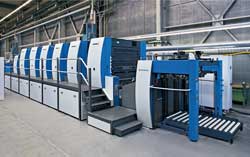
It is understood as lithography of a material, the application of a complete external lithographic system, which may include: armhole (or hook), different inks and finish varnish.
The type of normal control to be applied comprises a series of tests of two types:
A.- Control by Attributes: visually.
B.- Control by Variables: destructive tests
The conditions applicable to this control can be of the following type:
A.- Control by Attributes (taking as reference the Military Standard – “Military Standard”)
Verification: Time
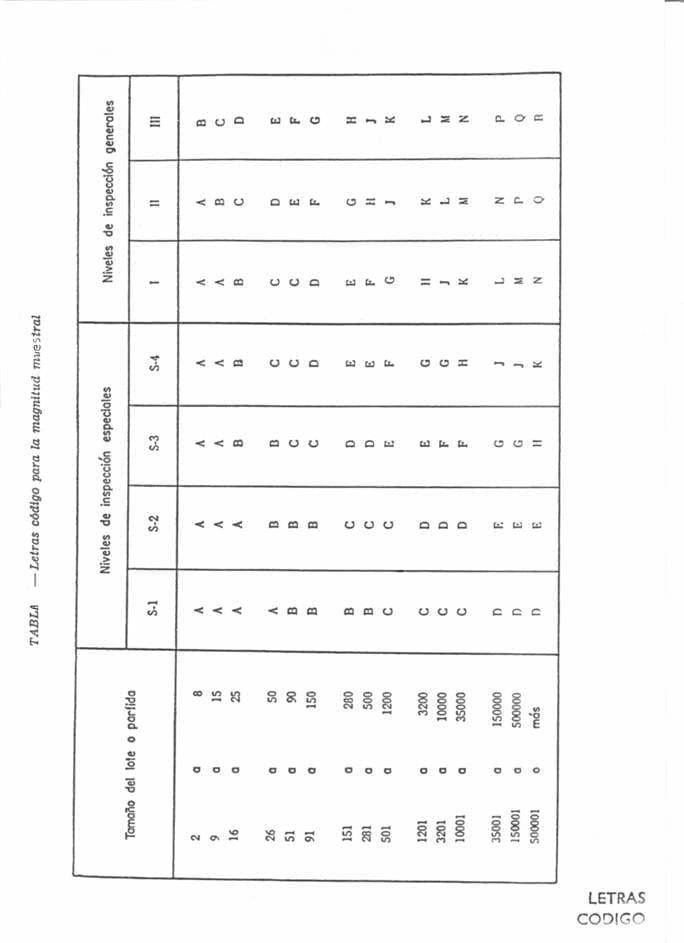
Inspection level: Special S-3 (See table A 1 appended at the end *)
Lot size: 3,201-10,000
Letter Code: F (See table B 1 appended at the end *)
No. of samples 20 sheets
Sampling plan: Simple
Inspection type: Normal
* For the management of these tables and the NCA criteria it is recommended to see the work “RULES OF RECEPTION”
B.- Control by Variables
Verification: Time
No. of samples: One sheet
RECOMMENDED TESTS FOR THE QUALITY CONTROL OF A LITHOGRAPHY
TEST INDEX
1 – Identification of the material
2 – Aspect of lithography
3 – Registration of lithography
4 – Comparison of colors
5 – Identification of the UPC symbol
6 – Metal exhibition
7 – Hardness test
8 – Resistance to stuffing
9 – Resistance to sterilization
DESCRIPTION OF THE TESTS
1.- IDENTIFICATION OF THE MATERIAL
OBJECTIVE:
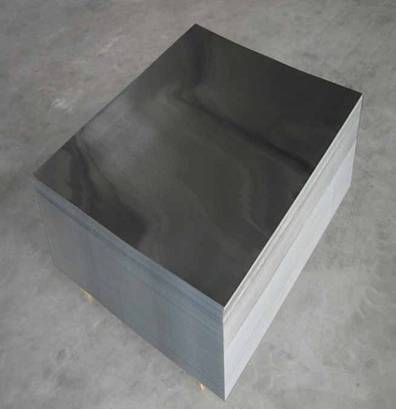
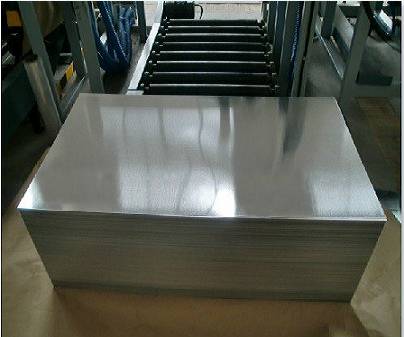
Check that the material (tinplate, TFS, aluminum …) intended for printing is the one provided in the order.
VERIFICATION FREQUENCY:
Upon receipt of each order in the lithography workshop.
APPARATUS TO BE USED:
None. Visual verification
PRINTED FOR REGISTRATION OF RESULTS:
Record any anomaly in the “OBSERVATIONS” column of form C.
VERIFICATION METHOD:
Visually determine:
– If each package comes with its corresponding label.
– If the label is properly filled with all the appropriate information
– If the labels correspond to the material defined in the Work Order opened for this order
2.- ASPECT OF LITHOGRAPHY
OBJECTIVE:
Make sure that the lithograph has an appropriate appearance
VERIFICATION FREQUENCY:
Take 20 finished sheets, not consecutive, at the beginning of the completion of each print run, and then every hour, at the output of the printing line oven
APPARATUS TO BE USED:
None. Visual verification
PRINTED FOR REGISTRATION OF RESULTS:
Printed C
WORKING SPECIFICATIONS
Absence of obvious visual defects
VERIFICATION METHOD:
Check each sheet for:
– Sharpness of the design and proper registration (adjustment) of colors
– Obvious defects, such as smudged lithography, stains, dirty backs, grill marks, etc.
– Beats, folds, crescents, edges and / or corners bent
– Scratches or other abrasions produced in the stackers
Reserve a sheet, at random, for the performance of destructive tests
3.- REGISTRATION OF LITHOGRAPHY
OBJECTIVE:
Verify that the lithography stain is positioned correctly on the sheet
VERIFICATION FREQUENCY:
One sheet at the beginning of the completion of each roll and then, every hour.
APPARATUS TO BE USED:
Tracer table, master sheets or depth gauge
PRINTED FOR REGISTRATION OF RESULTS:
Printed C
WORKING SPECIFICATIONS
See the corresponding drawing of the print distribution scheme on the material sheet. See at the end of the trajazo an example of it (Drawing E)
VERIFICATION METHOD:
Check using a tracer table or running master sheets if the position of the lithographic stain is properly placed on the sheet. If you do not have them, you can take measurements with a depth gauge.
4- COMPARISON OF COLORS
OBJETIVE:
Verify that the colors of the lithograph correspond to the range provided in the work order
VERIFICATION FREQUENCY:
One sheet finished every hour.
APPARATUS TO BE USED:
Visual verification by comparison with the color test accepted by the client
PRINTED FOR REGISTRATION OF RESULTS:
Printed D
WORKING SPECIFICATIONS
The color must be within the acceptable limits of the test
METHOD OF VERIFICATION:
Inspect the sheet comparing it with the color test accepted by the client.
5.- IDENTIFICATION OF THE UPC SYMBOL
OBJECTIVE:
Check that the code is correctly printed and that it can be read
VERIFICATION FREQUENCY:
A finished sheet, at the beginning of the completion of each roll, and then every hour
APPARATUS TO BE USED:
Code Reader
PRINTED FOR REGISTRATION OF RESULTS:
Printed D
WORKING SPECIFICATIONS
The decoded digits must be displayed on the screen and sound an audible “beep”. The verification of the digits must be verified at the beginning of each new roll
VERIFICATION METHOD:
Pass the scanning head over the bar codes of the four corners of the sheet. The decoded digits should appear on the screen and sound an audible “beep” on each code.
6.- EXPOSURE OF METAL
OBJECTIVE:
Check if the covering of inks and especially of the finished varnish of the system used, is adequate to protect the metal
VERIFICATION FREQUENCY:
A finished sheet, at the beginning of the completion of each roll, and then every hour
APPARATUS TO BE USED:
Cotton moistened with copper sulfate solution
PRINTED FOR REGISTRATION OF RESULTS:
Printed D
WORKING SPECIFICATIONS
There should be no metallic copper deposition on any area of the sheet
VERIFICATION METHOD:
Rub the surface of the sheet with the moistened cotton. Let the solution work for a few seconds and then wash the sheet with running water.
Observe at the naked eye, or with the help of an account, the possible points or areas with copper deposition.
7.- HARDNESS TEST
OBJECTIVE:
Determine if the finishing varnish has sufficient scratch consistency to withstand normal container handling
VERIFICATION FREQUENCY:
Optional. Carry out only when there are doubts about the behavior of the material.
APPARATUS TO BE USED:
Suitable sclerometer or Durometric Rod
PRINTED FOR REGISTRATION OF RESULTS:
Printed D
WORKING SPECIFICATIONS
Does not exist. They have to be established for the different finishing varnishes, after a series of 15 tests on so many items
VERIFICATION METHOD:
Measure and record the degree of hardness on 2 specimens (transversal and longitudinal to the direction of varnishing), following the instructions given with the device.
8.- RESISTANCE TO THE EMBUTITION
OBJECTIVE:
Check that the lithography adequately supports the drawing, in those jobs that are intended to manufacture embedded packaging.
VERIFICATION FREQUENCY:
One sheet at the beginning of the completion of each roll and then, every hour.
APPARATUS TO BE USED:
Test press or production press. Best Erichsen device, if available.
PRINTED FOR REGISTRATION OF RESULTS:
Printed D
WORKING SPECIFICATIONS
There should be no apparent alteration of the decorated surface either before or after subjecting the embossed samples to the sterilization resistance test
VERIFICATION METHOD:
Obtain a minimum of 6 embossed samples and examine half of them in terms of asperities, scratches, radius detachments, porosity, etc.
Submit the rest of the samples to the sterilization resistance test and then, judge them following the same criteria above.
9.- 9.- RESISTANCE TO STERILIZATION
OBJECTIVE:
Make sure that the lithography resists the process of autoclaving the canned.
VERIFICATION FREQUENCY:
One sheet at the beginning of the completion of each roll and then, every hour.
APPARATUS TO BE USED:
Autoclave
PRINTED FOR REGISTRATION OF RESULTS:
Printed D
WORKING SPECIFICATIONS
There must be no changes in tonality of the inks, absorption of water, loss of hardness and adhesion, etc. … as soon as the samples have reached room temperature
VERIFICATION METHOD:
Examine the samples, flat or drawn according to their final destination, after having subjected them to a thermal process of 45 minutes at 121ºC in water or steam.
Try them in terms of adhesion, hardness, etc … as soon as you have dried them with absorbent paper
DEFINITION OF CATEGORIES OR DEGREES OF SEVERITY OF DEFECTS
1.-Critical
Defect that renders useless, the transformed material, for the final use to which it is destined. Therefore, its existence will imply the safe rejection by the client in a more or less short term.
2.- Mayor
Defect that does not make useless, the material transformed, but that, with complete certainty, will be rejected by the client for aspect issues.
3.- Menor
Defect that, probably, but without security, will be rejected by the client due to aspect issues
Note: As an additional help to classify the defects in your category, follow the following reference:
- Critical.- Obvious defect for anyone, even if they are not familiar with our industry
- Major.- Clear defect for the majority of the profane in the matter, and definitively rejected for the clients.
- Minor.- Perceptible defect for most customers, but not all, and definitely recusable for our technical staff.
VISUAL IMPRESSION DEFECTS.- DEFINITIONS
(By attributes)
01.- BAD COLOR ADJUSTMENT (DEFICIENT LITOGRAPHY RECORD)
– MAJOR: Deficient registration of one or several inks, which results in a blurred or clearly defective print.
– MINOR: Mismatch of one or more inks that, without reaching the degree of blurred printing, produces a demerit of sharpness.
02.- DIFFERENCES OF TONALITY IN THE SHEET
– MAJOR: When there exist, at first sight, appreciable differences of tonality in one or more colors, within a single sheet.
– MINOR: When there are small differences in tone within the same sheet.
03.- DIFFERENCES OF TONALITY IN THE PULL
– GREATER: When noticeable differences of tonality are detected, in one or more colors, between different sheets of the same run.
– MINOR: When small differences of tonality are detected, in one or more colors, between different sheets of the same run.
04.- DIRTY ON LEAVES
– MINOR: Any type of contamination, other than inks or grease on the outer face of the leaves.
05.- ILLEGIBLE TEXT
– CRITICAL: Any defect that prevents easy reading of the legal text of the label (weights, ingredients, expiration date, etc.).
– MAJOR: Any printing defect that prevents easy reading of the optional text.
06.- STAINS OF INK
– CRITICAL: Stains of any size, which impede the perfect readability of the legal text of any element of the sheet.
– MAJOR: Stains of any size, which do not prevent the reading of the legal text, but deteriorate the good general appearance of the print.
– MINOR: Minor spots that deteriorate the good appearance of an isolated element of the leaf.
07.- STRIPES OR ABRASIONS
– MAJOR: When they are deep and reach the metal or prevent a good reading of the label.
– MINOR: When they are shallow and do not prevent reading the label, but deteriorate the good appearance of the print.
08.- GREASE
– MINOR: Any type and quantity that appears on the outside of the leaves.
09.- PRINTING OUT OF MEASURES
– CRITICAL: Incorrect dimensions of the impression, which seriously affect the appearance of the transformed material or prevent a correct transformation of the material.
– MINOR: Incorrect dimensions of the impression, but which do not affect the appearance or prevent the correct transformation.
10.- DEFECTIVE RESERVES
– CRITICAL: Reserves, generally of smaller width than those specified, that make impossible a correct transformation of the material.
– MAJOR: Incorrect reservations that affect the good visual appearance of the transformed material.
NON-DETECTABLE DEFECTS OF VISUAL PRINTING.- DEFINITIONS
(By variables)
01.- DIFFERENCE OF TONALITY WITH THE COLOR RANGE
– MAJOR: An appreciable difference between the tonality of the print run and the range of colors approved by the customer.
– MINOR: Small differences between the tonality of the print run and the range of colors approved by the customer
02.- DEFECTIVE UPC CODE
– CRITICAL: When the reader detects anomalies about the code.
03.- METAL EXPOSURE
04.- HARDNESS TEST
05.- RESISTANCE TO THE EMBUTITION
06.- RESISTANCE TO STERILIZATION
For defects 03 to 06, refer to the sections “Work specifications” and “Verification method” for each test and to the criteria indicated in “Defining the categories of degrees of severity of defects: critical, major and minor. “
TABLE A
IMPRESO C
| QUALITY CONTROL OF LITHOGRAPHED MATERIALS | ||||||||||||||||
| Printed A | ||||||||||||||||
| ATTRIBUTES CONTROL | ||||||||||||||||
| Order N ° | ||||||||||||||||
| Date | ||||||||||||||||
| Hour | ||||||||||||||||
| Sample size | 20 | 20 | 20 | 20 | 20 | 20 | 20 | 20 | 20 | 20 | 20 | 20 | 20 | 20 | 20 | 20 |
| Wrong colors | ||||||||||||||||
| Difference of tonality in sheet | ||||||||||||||||
| Difference thrown tonality | ||||||||||||||||
| Dirt leaves | ||||||||||||||||
| Unreadable text | ||||||||||||||||
| Scratches, abrasions | ||||||||||||||||
| Rayaduras, abrasiones | ||||||||||||||||
| Grease | ||||||||||||||||
| Printing out of measures | ||||||||||||||||
| Defective reserves | ||||||||||||||||
| Observations | ||||||||||||||||
Drawing of the print distribution scheme on the sheet of material .
In this scheme, the printing distribution of an embossed container is reflected. On the outside face is drawn:
– By means of black arrows the direction of advance of the sheet in the printing – lithography – and in the operation of cutting in scroll.
– The cutting disc and the areas destined to contain texts (striped areas).
– The position of each cut on the sheet.
– The arrangement of the reference stops – 3 black triangles – in lithography and scroll cutting operations.
On the inside face is drawn:
– By means of black arrows the direction of advance in the line of cut of coils, of the sheet in the line of lacquering and of each strip in the press of drawing.
– The arrangement of the reference stops – 3 black triangles – in these three operations, and which are the same as in the “exterior”.
With these data it is possible to verify, on a lithographed sheet, if the printed circles are well positioned.
PRINTED D
| CONTROL QUALITY OF LITHOGRAPHIC MATERIALS | ||||||||||||||||
| Printed B | ||||||||||||||||
| ATTRIBUTES CONTROL | ||||||||||||||||
| Order N ° | ||||||||||||||||
| Date | ||||||||||||||||
| Hour | ||||||||||||||||
| Comparison with colors range | ||||||||||||||||
| UPC symbol | ||||||||||||||||
| Metal exhibition | ||||||||||||||||
| Hardness test | ||||||||||||||||
| Resistance to stuffing | ||||||||||||||||
| Resistance to sterilization: | ||||||||||||||||
| Flat samples | ||||||||||||||||
| Sausages | ||||||||||||||||




0 Comments