SUMMARY
The overall quality of the cut bodies directly affects the efficiency of the packaging manufacturing lines. Among the parameters that influence this efficiency, it is necessary to count on the quality of cut, the linear and angular dimensions of the cut bodies and the adequate reserves or margins of lithography and varnishes. The following work develops the criteria for its adequate realization.
INTRODUCTION
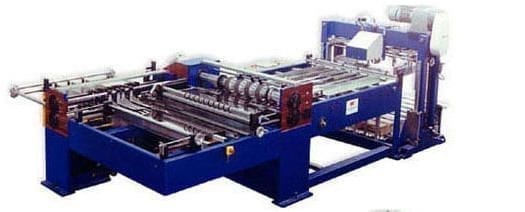
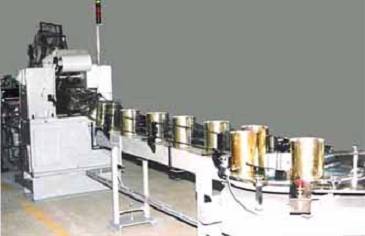
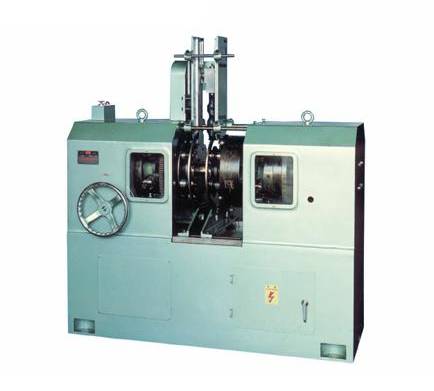
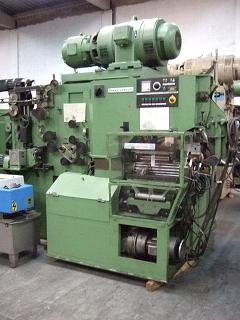
The double automatic cutting machine is the machine that always leads all manufacturing lines for three-piece containers. The general concept on which this type of machine is based is old – it goes back to pre-World War II times. In general these machines, even the oldest, did not give significant problems until several important changes have occurred in the last quarter of the last century:
– The substitution of the sewn-or welded seam-by the electrically welded seam. With it the necessary material for this operation has been drastically reduced and with it its precision.
– The reduction of the thickness of the tinplate used and the increase of its hardness – use of tinplate DR-.
– The increase of the size of the leaves, to diminish its cost and the work in the section of lithography.
These factors led to the appearance of serious difficulties in the operation of cutting the bodies.
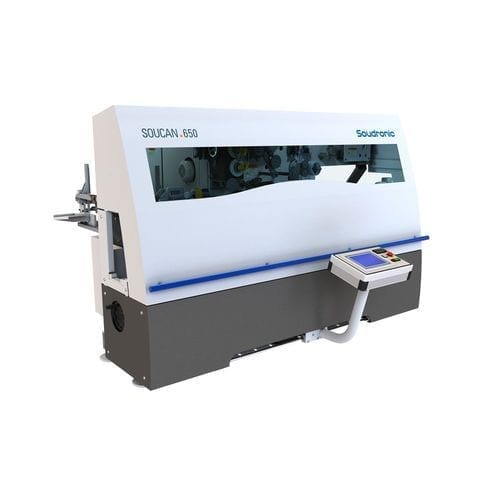
As a result of this the manufacturers of these machines have introduced important improvements, such as among others: the system for fixing the blades and the material thereof, the control of the blade, the way of stacking the bodies, etc., although the operating criterion remains the same.
With the incorporation of these new improved mowers, there was a very significant increase in the performance of the whole line, because not only improved the performance of the machine itself, but that of all others – welder, pestañadota, cerradora – that formed installation. A thorough analysis revealed that the increase in profits was due to the advance in the precision and quality of the cutting operation. Let’s enter in your exam.
PARAMETERS
There are four main parameters associated with the cutting of bodies:
– Quality of cutting edges.
– Linear dimensions
– Angular dimensions
– Reservations and margins.
The traditional system of inspection of the quality of cut, is based mainly on the verification of the dimensions – development and height -, and the mismatch. The latter is verified in a simple way, superimposing two bodies, one of them turned around, and visually evaluating the deviation between its edges. These systems are inadequate today.
The detailed examination of the parameters revealed the following important aspects, which have a clear impact on the results of the successive online operations:
– Presence of burrs on the cutting edge.
– Absence of discontinuities caused by damaged cutting edges.
– Cutting length determined by the distance between the first operation blades and the guide surfaces.
– Cutting height determined by the distance between the second operation blades and the guide surfaces.
– Parallel errors during the first cutting operation, caused by inefficiencies in the guidance system, which allows a progressive curving of the band, resulting in defective strips
– Parallelism errors during the second operation similar to those of the first operation but smaller.
– Deviation in the straightness of the cutting line, effect known as “banana shape” and caused by inefficiencies of the drag rollers.
– Unbalanced cut during the first operation caused by an incorrect adjustment of the “adjustment points” in the longitudinal direction.
– Cut unbalanced during the second operation similar to what happened in the first.
– Out-of-square records caused by lack of control in adjustment and guidance.
– Out of position records caused by incorrect lateral guidance.
A set of axes of blades very rigid and robust ensures equal and uniform play between the different pairs of cutting blades, this set should be a tenth of the thickness of the tinplate, thus ensuring a cuts free of burrs.
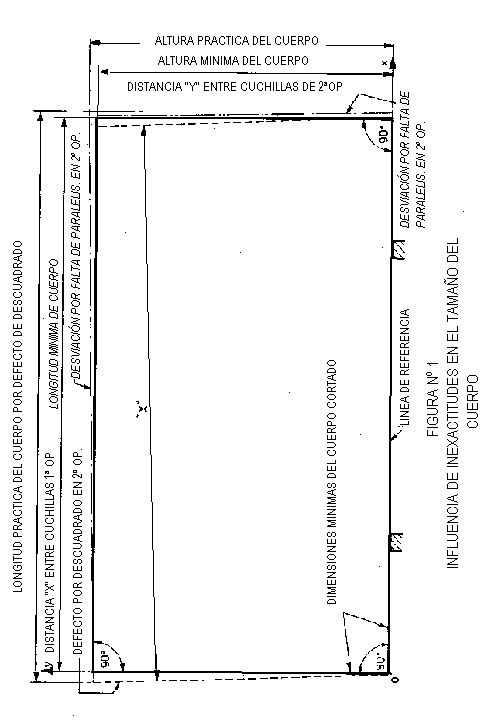
If we analyze the geometrical parameters of the flat bodies in relation to the linear and angular measurements, it is obvious that it is impossible to generate dimensions of the same lower than the distance between the cutting blades, as shown in Figure No. 1.
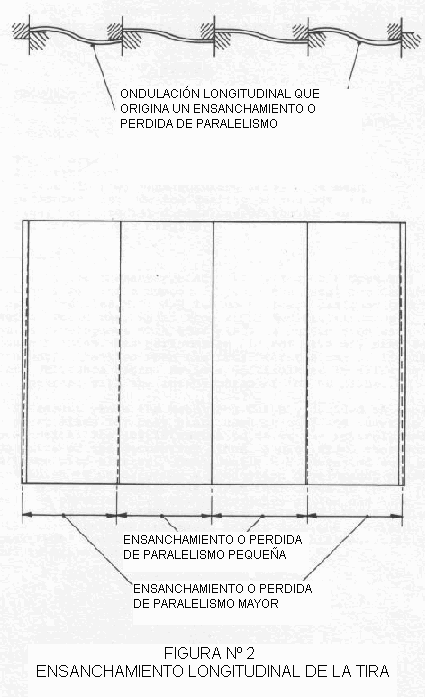
However, there may be an apparent decrease in size if the body is not flat. On the contrary, the linear dimensions can be greater than the distance between blades, as shown in Figure 2.
This effect occurs because the material does not remain perfectly flat during its passage between the cutting blades, and forms a longitudinal undulation which can be increased in depth during the advancement of the blade. This phenomenon usually produces additional effects on the shape of the cut strips. The unbalanced during the second cutting operation will produce flat bodies in the form of a parallelogram, which in spite of having correct linear dimensions presents unequal diagonals. The errors in the records during the cut are usually caused by inefficient adjustment during the first and second operation, but in addition, they may be additionally influenced by the undulations already mentioned in the material during the progression of the cut.
A cutter with correct operation must not produce flat bodies with the mentioned failures. However, it is necessary that the sheets of the material to be cut have a good quality, and be free from damage caused in previous operations.
INFLUENCE OF CUTTING QUALITY
Excessive burrs make it difficult to control the body during subsequent handling and fabrication operations. The bodies can become entangled in the welder’s warehouse and generate difficulties when separating one from the pile. Often a double body can be fed, this would cause a stop in the machine and the need to remove it, resulting in a measurable loss of production. Also an excess of burrs affects negatively at the time of welding. If they go inside the surfaces to be welded, they will prevent full contact of these surfaces and therefore increase the resistance to current flow, altering the welding parameters. If they are on the outside, they will damage the surface of the electrodes – copper wire -. Therefore it is necessary that the burrs remain within certain limits so as not to harm the work in the welders.
Perhaps the most vulnerable operation to be influenced by burrs is that of blinking. An edge with strong burrs can cause an incipient crack during the flanging operation. On the other hand, discontinuities or nicks in the cutting edges of the blades create an imperfect cutting edge and inevitably generate a crack or crack potential during the flanging. The quality of the cutting edges becomes really critical when the thickness of the tin plate decreases and the temper of it increases. It is not easy a continuous inspection of the tabs of the containers to detect cracks in them. There is a risk that large runs should be blocked by this defect, unless the frequency thereof is small and can be tolerated. The use of tungsten carbide blades significantly reduces this risk.
INFLUENCE OF DIMENSIONAL ACCURACY
The perfect flat body has the smallest possible measurements when being cut in the shear, as illustrated in figure # 1. Some errors increase certain dimensions, this can cause difficulties at the time of feeding these defective bodies in the warehouse. the welder when the suction cups try to separate them. An especially deceptive effect is that which causes unbalanced bodies that have their correct length and height. When placed on a coordinate plate, one of its dimensions appears as too large. Such bodies can create a number of difficulties when they are transported along the length of the welder. The overlap of material for welding can be defective due to this problem, progressively reducing from one end to the other of the welded joint. This can be serious, since it does not keep the material to be welded constant, and can lead to areas of burned welding in the narrowest part. When a lack of parallelism occurs in the second cutting operation, it generates in the bodies once welded a disparity in one of the ends of the welded seam. It is said that there is disparity when the two extremes of the development of the body do not exactly coincide and a projection or step appears at the flange edge in the welding area. The correct operation of flanging depends on the appropriate body dimensions. For obvious reasons, an excess in the height of the body or presence of disparity will create problems in the operation of blinking. Normally only a small percentage of bodies can have dimensions above the standard, but to avoid excessive tabs and possible breaks of them, you must adjust the flanger to produce bodies with the flange slightly below the nominal, although within specifications , that is, with the tab towards the minimum of what is specified.
The dimensional faults are also manifested in the closing operation. Bodies with disparity at one end for lack of parallelism, produce uneven body hooks, which may be below acceptable values.
INFLUENCE OF INACCURATE RECORDS
The packages in general are lithographed on the outside and varnished inside. It is of the utmost importance that the interior varnish stain be adequately matched to the exterior and maintain a precise relationship. The material must be cut in such a way as to ensure the correct situation of the varnish stains and their corresponding reserves. If the lateral varnish reserves are not positioned perfectly, a problem will be generated at the time of the welding, since the varnish will act as an insulator and will prevent a good passage of the welding current. An inadequate adjustment of the records in the cutter, will produce the waste of complete sheets, since the error will affect the whole sheet. A leaf cut with the reserves poorly positioned, “contaminate” all the pile of cut bodies if it gets mixed with others.
GENERAL COMMENT
The role of the cutting operation of bodies is vital, since it has a great influence on the performance of the entire manufacturing line. Therefore, a good cutter must be available at the head of the installation. In addition, it is imperative that the mechanics in charge of putting them on are well trained and know the machine and its adjustments perfectly.
Many times the bad behavior of a line, due to its low performance in some machines or excessive waste, is mistakenly attributed to other circumstances, when to a large extent the problems would be solved with a good cut of the bodies.
As a summary of everything said, we could conclude that it is fundamental:
– The elimination of burrs in the cut.
– The accuracy of the linear and angular measurements of the body
Therefore, the Quality Control Department – or the line mechanics if self-monitoring is practiced – must be provided with the adequate means to carry out a complete verification of the aforementioned parameters. A good digital electronic gauge control of flat bodies is a team that should not be missing in a packaging factory.




0 Comments