Introduction
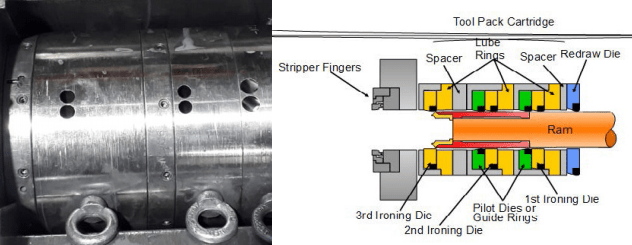
Die Modules are essential components of ToolPack systems, commonly used in the manufacturing and metalworking industries. These modules house the Dies that perform various operations such as shaping, cutting, and forming on metal sheets or other materials. Ensuring the proper functioning of Die Modules is crucial for maintaining productivity and quality in the manufacturing process. In this article, we will discuss the common issues that may arise with Die Modules and provide a detailed guide on troubleshooting these problems.
Inspecting Die Modules for Damage
The first step in troubleshooting Die Modules is to inspect the ToolPack parts for any signs of damage, such as burrs, nicks, dents, or other irregularities. If any raised damage is found, it should be smoothed out using a stone or a similar abrasive tool.
Removing and Cleaning Dies
Before proceeding with any repairs or replacements, it is essential to remove the Die(s) from the ToolPack and inspect the internal area where the Die(s) were removed. Any rough or damaged surfaces inside the ToolPack Modules should be stoned and cleaned up. Additionally, blow out the Module to remove any dirt, fine particles, or other contaminants.
Checking the Condition of Dies
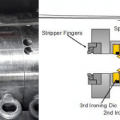
When inspecting the Dies, ensure that their outer diameter (OD) and faces are free of nicks, dents, burrs, or any other rough surface conditions. Repair or replace Dies that are not in good condition. The ironing Die should fit into the centering pins and go into the Module smoothly, without being too loose or too tight. If the Die is too loose, check its OD and try a different Die for testing purposes. If it is still loose, consider changing the ToolPack Springs. If the Die is too tight, check for burrs, damage, or dirt obstructing the Module.
Installing Dies and Checking Float
For Die Modules with cover plates, install the cover on the Modules and tighten the screws evenly. Then, reach inside the Die’s inner diameter (ID) with your fingers and ensure that the Die(s) can move off-center (float). If the Dies are locked in place and do not move, measure the depth of the space for the Die and the thickness of the Die. If the Die(s) are too thick, replace them with the correct size Die(s). If the depth is not at least 0.001″ or 0.025mm greater than the Die, contact your dealer for instructions. If the Dies move around with too much clearance (slop), change the Springs as needed.
Reassembling the ToolPack Modules
After addressing any issues with the Dies and Die Modules, it is crucial to double-check that the Dies are installed correctly, facing the right direction, and in the proper order. Stone the wear plates and mounting rails in the Cradle, ensuring that the surface is smooth and free of burrs. Clean out the Cradle well and carefully install the ToolPack Modules.
Conclusion
Regular inspection and maintenance of Die Modules in ToolPack systems are vital for ensuring optimal performance and longevity. By following the troubleshooting steps outlined in this article, you can effectively address any issues with Die Modules and maintain a high level of productivity and quality in your manufacturing processes.

